

Getting started
Install and connect the plugin
Connect a WordPress site to WP Admin Online: add it in the dashboard and paste its keys, or connect many sites at once with your account token.
Applies to: All plans
The plugin is how a WordPress site talks to your dashboard. It's called RS Remote Site Manager, and it needs WordPress 6.2 or newer and PHP 8.0 or newer.
There are three ways to connect a site. You can add it in the dashboard first and paste its keys into the plugin. You can paste one account token into the plugin and approve the site afterwards, which is quicker when you're connecting many sites. Or, if you work on the command line, you can install and connect the plugin with WP-CLI.
Option 1: add the site, then paste its keys
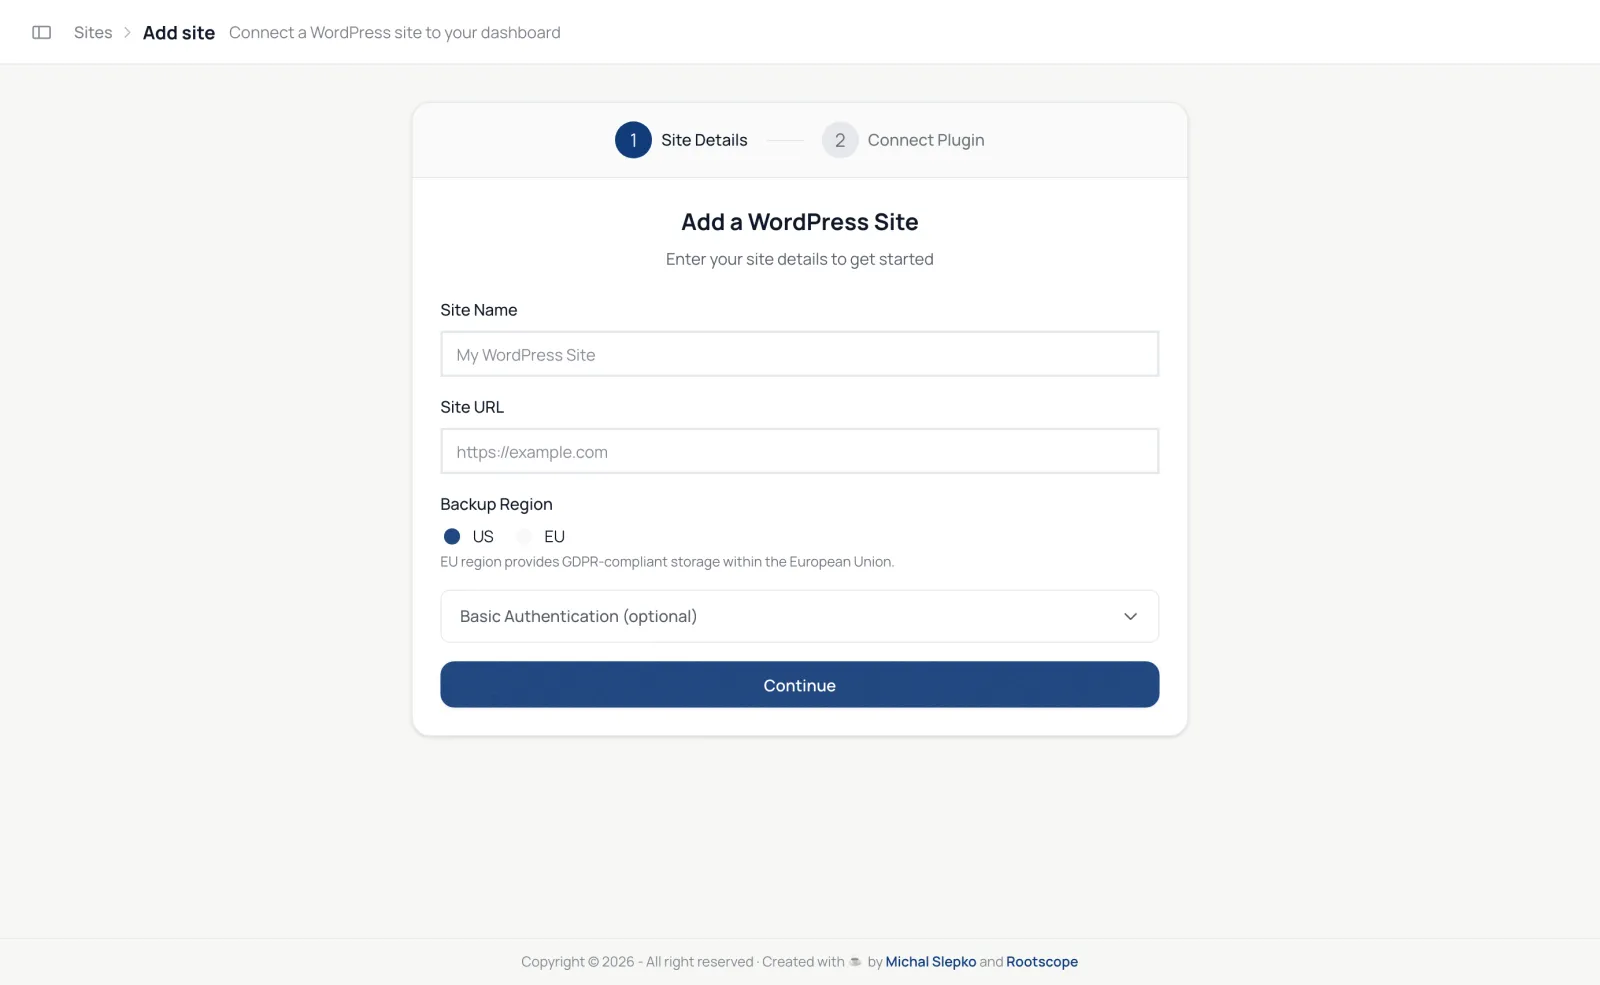
- In the dashboard, open Sites and click Add site.
- Enter a Site Name and the Site URL, and choose a Backup Region: EU keeps backups in the European Union, US in the United States.
- If the site sits behind HTTP basic authentication, which is common on staging sites, fill in Basic Authentication (optional) with its username and password.
- Click Continue. The next screen shows the site's API Key and API Secret. Keep it open.
- In the site's wp-admin, go to Plugins → Add New, search for "RS Remote Site Manager", then install and activate it. You can also download the zip from WordPress.org and upload it under Plugins → Add New → Upload Plugin.
- Go to Tools → RS Remote Site Manager. Under — or configure manually —, paste the API key and secret, then click Save Credentials.
- Click Verify Connection. When it says the connection is verified, go back to the dashboard and click Check Connection.
Option 2: connect with your account token
The account token lets the plugin register the site for you.
- In the dashboard, open the account menu (your photo or initial) and choose Account token. Click Generate Token and copy the token straight away: it's shown only once. If you lose it, Regenerate token creates a new one and stops the old one working.
- Install and activate the plugin on the site, as in step 5 above.
- In Tools → RS Remote Site Manager, under Quick Setup (Recommended), paste the token into Account Token and click Connect Site.
- Back in the dashboard, the Sites page shows the site as awaiting approval. Click Approve All, or approve it from its row.
The same token works on every site, so you can repeat steps 2 to 4 on each one without going back to the dashboard.
Option 3: connect from the command line
If you can reach the site over SSH and it has WP-CLI, two commands do the whole job. This needs RS Remote Site Manager 3.5.0 or newer. On a site that already has an older version, run wp plugin update rootscope-remote-site-manager first.
-
Generate your account token as in step 1 of Option 2. The Account token window shows the command with your token already filled in, ready to copy.
-
In the site's WordPress folder, install and activate the plugin:
wp plugin install rootscope-remote-site-manager --activate -
Connect the site:
wp rsadmin connect <your-token>It answers Site registered successfully. If the site is already connected, it says so and changes nothing.
-
Approve the site on the dashboard's Sites page, as in step 4 of Option 2.
The token is the same for every site, so you can run these two commands across all your servers from one script.
Choose the account for one-click login
One-click login signs you in to wp-admin as a WordPress administrator you choose. Pick it in the plugin under Login Administrator, or in the dashboard's setup steps under Default administrator. Administrator accounts appear in the dashboard after the first sync.
Finish the setup steps
After the first connection, the dashboard offers two short setup steps. You can skip them with Skip setup for now and come back later.
- Settings: assign a Client, pick the Default administrator, and turn on Uptime monitoring with a check interval from every minute to every 60 minutes. Every 10 minutes is the recommended setting. Uptime monitoring is part of the paid plans.
- Backups: turn on Back up this site automatically, choose daily, weekly or monthly, and pick the storage location. Scheduled backups are part of the paid plans, which also take a snapshot before each safe update.
If the connection fails
- Verify Connection fails. Check that the key and secret were pasted without extra spaces, and that the site URL in the dashboard matches the address the site uses, including
https://andwww. - The site is behind basic authentication. Enter its username and password under Basic Authentication (optional) when you add the site.
- A security plugin or firewall blocks the request. The plugin answers on the WordPress REST API under
/wp-json/rsadmin/v1/. If a security plugin or your host blocks the REST API, allow that path.
Next: Running updates.